Pin It
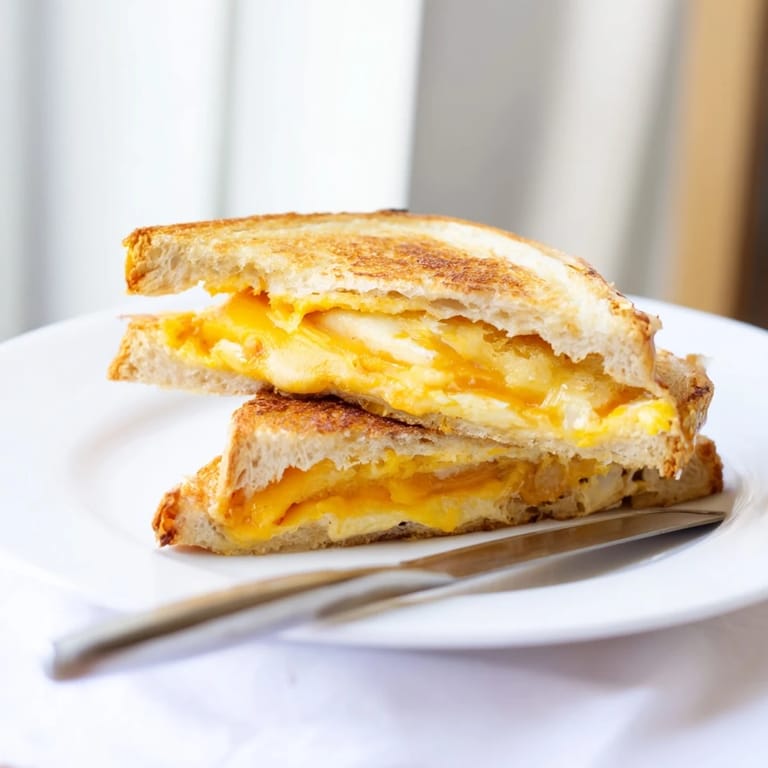
 Rainy Sunday afternoons were made for this kind of cooking. I stumbled onto the butter-mayo combination completely by accident when I ran out of butter halfway through making lunch for my roommates. The sandwich that came off the pan had this impossibly shattering crust that made everyone stop mid-conversation. Now it is the only way I make grilled cheese, rainy day or not.
My youngest brother visited last month and watched me make these with genuine fascination. He had been making grilled cheese wrong his entire life by rushing the heat and Wonder bread. We stood over the stove together as I taught him the patient art of medium-low heat. He texted me the next day saying he made three for breakfast.
Ingredients
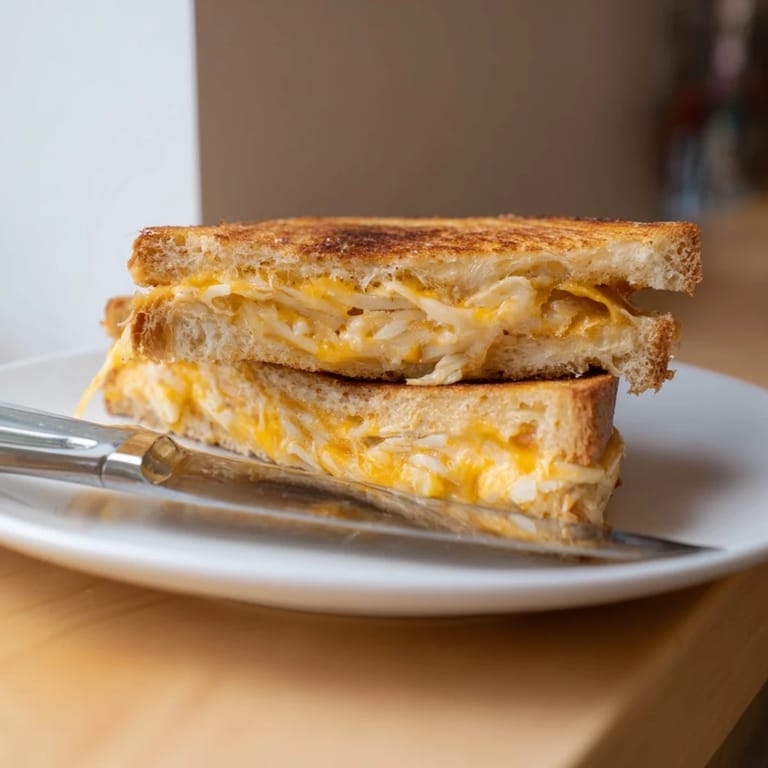
- Thick sourdough bread: The sturdy structure holds up to the cheese melting process without getting soggy and develops beautiful grill marks
- Sharp cheddar cheese: Brings the bold tangy backbone that cuts through the richness of the other cheeses
- Provolone cheese: Adds a mellow nuttiness and excellent meltability that bridges the flavors
- Shredded mozzarella cheese: Creates those irresistible cheese pulls and creamy texture throughout
- Unsalted butter: Spreads easily and lets you control the seasoning since the cheese already brings plenty of salt
- Mayonnaise: The secret ingredient for the crispest exterior you will ever achieve on a sandwich
Tired of Takeout? 🥡
Get 10 meals you can make faster than delivery arrives. Seriously.
One email. No spam. Unsubscribe anytime.
Instructions
- Prep your bread canvas:
- Lay out all four sourdough slices and spread softened butter on one side of each piece. If you are committing to maximum crispiness spread a thin layer of mayo on the opposite side of each slice.
- Build your cheese tower:
- Place two slices buttered side down on your work surface. Layer each with cheddar first then provolone then divide the mozzarella between them.
- Seal the deal:
- Top each sandwich with the remaining bread slices making sure the buttered side faces up. Press down gently to help everything settle together.
- Get the pan ready:
- Heat a large skillet or griddle over medium-low heat. You want it hot enough to sizzle gently but not so hot that the bread burns before the cheese melts.
- Toast to golden perfection:
- Carefully place sandwiches in the pan and cook for 3 to 5 minutes per side. Press down occasionally with your spatula and flip when the underside is deep golden brown.
- The waiting game:
- Let them rest on a cutting board for one full minute before slicing. This small pause prevents all that glorious cheese from oozing out the moment you cut in.
 Pin It
 These sandwiches have become my go-to midnight snack during long writing sessions. There is something meditative about standing at the stove listening to the gentle sizzle while the cheese melts into molten rivers. Simple food prepared with attention is its own kind of magic.
Making It Your Own
Sometimes I add a thin layer of Dijon mustard to the inside bread slices for a sharp contrast. A few tomato slices work beautifully too especially in summer when they are at their peak. The key is keeping additions thin so they do not interfere with the cheese melting.
The Perfect Cheese Ratio
After dozens of batches I have found that equal parts sliced cheese to shredded cheese gives the best results. The slices provide structure while the shredded cheese fills every nook and cranny. Too much of just one type gives you either a solid block or a messy puddle.
Serving Suggestions
Classic tomato soup is the obvious companion but do not overlook other options. A sharp arugula salad with vinaigrette cuts through the richness beautifully. Pickled vegetables on the side add brightness that balances all that cheese.
- Cut sandwiches on the diagonal for easier eating
- Serve immediately while the cheese is at maximum meltiness
- Keep a spatula nearby for any escaping cheese strands
 Pin It
 Some recipes are complicated but this one proves that good ingredients and patience are often all you need. Perfect comfort food does not require much more than that.
Recipe FAQs
- → How do I prevent the bread from burning while the cheese melts?
Cook on medium-low heat and press gently with your spatula. This allows the cheese time to melt without over-browning the bread. Cook for 3–5 minutes per side, adjusting heat as needed.
- → Can I prepare this sandwich ahead of time?
Assemble the sandwich just before cooking for best results. Buttering the bread ahead is fine, but keeping assembled sandwiches sitting may cause the bread to absorb moisture and become soggy.
- → What cheese alternatives work well in this sandwich?
Swiss, Gruyère, fontina, or aged gouda are excellent substitutes. Mix and match cheeses to your taste, keeping a balance of sharp and creamy varieties for optimal flavor.
- → Why use mayonnaise in addition to butter?
Mayonnaise contains emulsifiers that help create an extra-crispy, golden exterior on the bread while butter adds richness. It's optional but enhances the texture and browning.
- → What pairs well as a side dish?
Tomato soup is the classic pairing—the acidity cuts through the richness. A crisp green salad, pickles, or tomato slices also complement the melty cheese perfectly.
- → Can I make this with gluten-free bread?
Yes, gluten-free sourdough works wonderfully. Use thicker slices and watch the heat carefully, as gluten-free bread may brown differently than traditional sourdough.