 Pin It
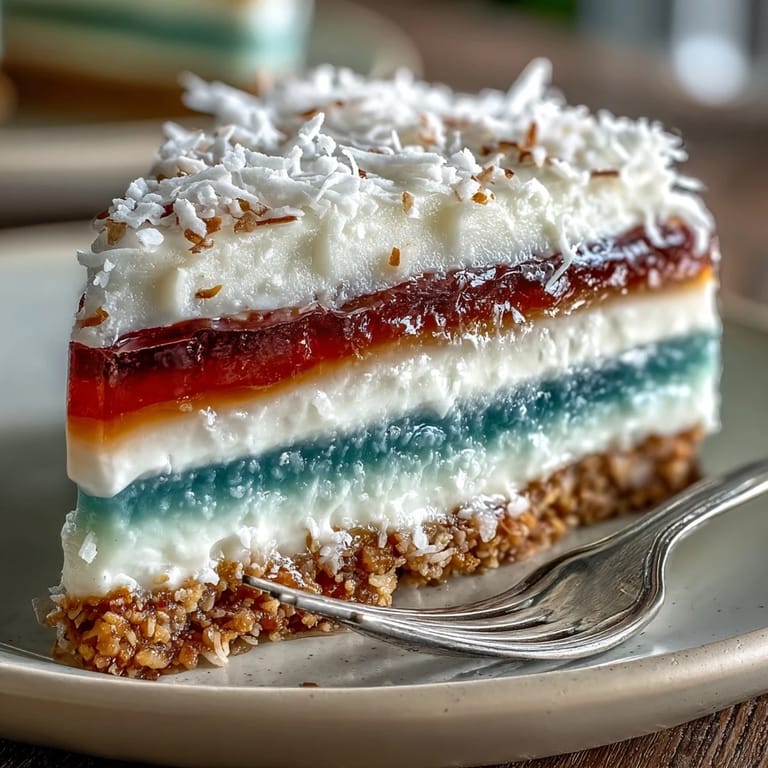
 The first time I set out to make a Rainbow Jelly Cake, it wasn’t for a special occasion — I just wanted an excuse to fill my kitchen with color on a muggy summer afternoon. As the agar-agar simmered, there was a gentle fragrance, almost grassy, that felt nostalgic but also completely new. The whole process became oddly meditative, stirring and watching the clear liquid bloom with vibrant swirls as the food coloring met the heat. There were a few splatters on the countertop, and my fingers wore shades of blue and green for days, but the promise of a wobbly, jewel-toned slice was too tempting to care. And as the final coconut layer cooled, I remember being so captivated by the glossy finish, I nearly forgot to chill it before serving.
I still laugh about the time I tried this recipe for my sister's birthday, only to have tiny cousins crowd around the fridge every half hour “just to check” if the jelly was ready. Waiting was half the excitement, and watching everyone’s face when the cake finally turned out onto the plate — perfect layers, coconut shimmer — was a memorable little triumph.
Ingredients
- Agar-Agar Powder: This seaweed-derived star gives the cake its sturdy yet tender texture and is a must for the distinct, glassy finish — be sure to dissolve it entirely for the silkiest layers.
- Water: Precision matters for each layer to set just right; use filtered water if your tap has a strong taste.
- Granulated Sugar: Sweetens but doesn’t overpower, and I’ve found superfine sugar melts faster for a smoother jelly.
- Food Colorings: Go for bold gel or natural colors; just a few drops really do go a long way.
- Vanilla Extract (optional): Adds a subtle warmth — skip it if you want the purest fruitiness from your food coloring choices.
- Coconut Cream: Its rich, tropical depth provides a creamy contrast and helps the white layer feel decadent yet airy; always stir well before using.
- Pinch of Salt: Don’t forget this — just a touch wakes everything up and keeps the coconut from tasting flat.
Tired of Takeout? 🥡
Get 10 meals you can make faster than delivery arrives. Seriously.
One email. No spam. Unsubscribe anytime.
Instructions
- Create the Rainbow Base:
- Combine agar-agar powder and water in a saucepan and bring it to a gentle boil. Stir briskly — you'll hear it softly bubbling as the powder disappears, turning the liquid crystal clear.
- Sweeten and Flavor:
- Add sugar (and vanilla, if using), and watch as it dissolves, transforming into a glossy syrup with a faint vanilla scent.
- Divide & Tint:
- Pour the mixture evenly into 6 heat-proof bowls. Drop in your colors; swirl with a spoon until bright and mesmerizing.
- Layer Like a Pro:
- Begin with red, slowly pouring into your mold. Tap gently to even out, and wait for just the right wobble before adding the next color — patience is everything here.
- Build Each Color:
- Continue layering orange, yellow, green, blue, and purple, each time letting the top gently set but remain tacky so the colors meld but stay defined.
- Cook the Coconut Cream:
- In a clean pot, whisk together agar-agar, water, and coconut cream. Listen for the soft simmer while adding sugar and salt; don't let it catch on the bottom.
- Top It Off:
- Once the rainbow layers are cool and firm to the touch, pour the warm coconut cream over the top, letting it settle into every curve.
- Chill Until Dreamy:
- Pop into the fridge for at least an hour. The wait is worth it — the cake will easily release with a swift run of a knife around the edge.
- Slice and Share:
- Cut through the cool, shimmering layers, and serve immediately for maximum effect. Each slice is nothing short of dazzling.
 Pin It
 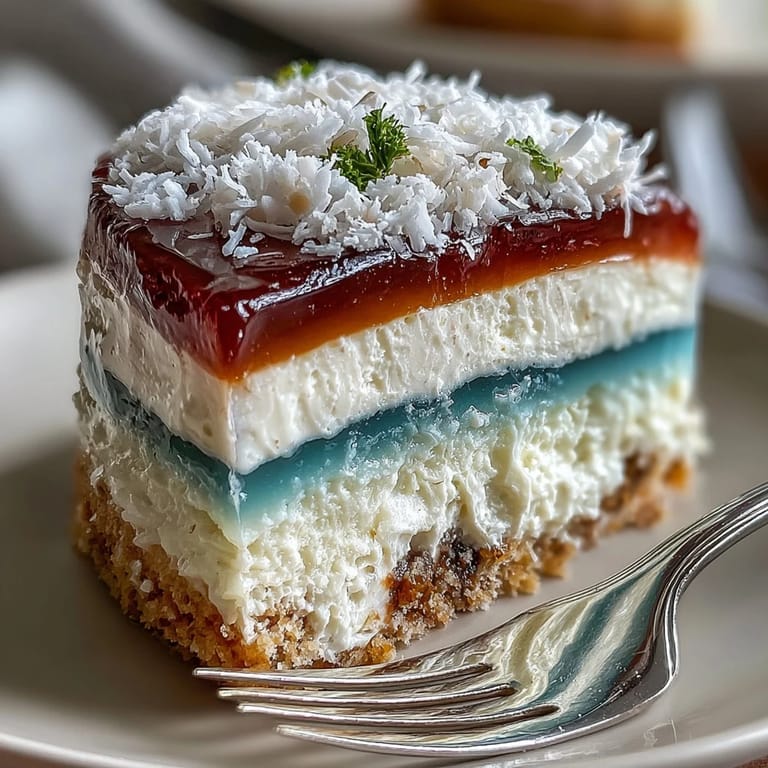 Pin It
 One humid evening, we shared slices under string lights in the backyard, the jelly cake catching gleams of sunset and laughter echoing against the fence. Somehow, it felt less like dessert and more like a centerpiece for a fleeting, perfect night.
Layering Perfection: How to Get Crisp Edges
I used to rush between layers, but waiting until each one is barely set (not fully hard) gives you those vivid stripes with just the faintest blend — a trick learned from messing up more than once. A gentle tap on the side of the mold helps ensure each layer spreads into every nook, and if you're nervous, a quick pass with an offset spatula can smooth out any bubbles.
Choosing Colors and Flavors
Don’t hesitate to play with naturally-derived colorings like beet, butterfly pea flower, or turmeric for unique tones — and each offers subtle earthy notes that make each bite feel special. Adding a touch of pandan or rose essence to select layers provides surprising depth and makes the cake unmistakably yours.
Serving and Storage Magic
A chilled plate prevents the jelly from sweating and helps keep the slices pristine when serving, especially on a hot day. This cake keeps beautifully for up to three days in the fridge, though it's rare there's anything left by then.
- Run your knife under hot water for clean, photo-worthy slices.
- Cover leftover cake with plastic wrap to keep it from absorbing fridge odors.
- Serve straight from the fridge for the best, bouncy texture.
 Pin It
 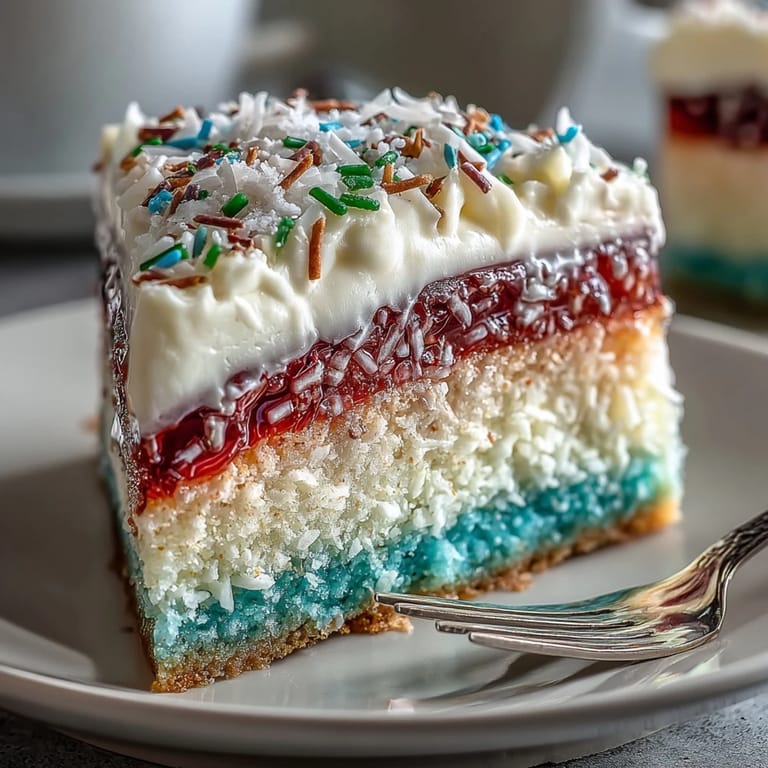 Pin It
 May your jelly layers be bold, your coconut luscious, and each slice bring a little spark to your table. There’s a special kind of fun in cutting into colors that you made with your own hands.
Recipe FAQs
- → How long does each jelly layer need to set before adding the next?
Allow each colored layer to sit 5–8 minutes until it’s just set on the surface but still slightly warm underneath; this helps layers adhere without blending. If a layer firms too much, warm the next pour slightly so it bonds.
- → Can agar-agar be substituted with gelatin?
Agar-agar sets more firmly and is plant-based; gelatin yields a softer, less heat-stable gel and is animal-derived. Substituting will change texture and setting behavior—adjust ratios and chilling accordingly.
- → How do I prevent colors from bleeding between layers?
Pour each layer when it is just beginning to set and cool slightly rather than piping hot. Use a ladle and pour gently over the back of a spoon to disperse the liquid and avoid disturbing the layer beneath.
- → Will the coconut cream layer set properly?
Yes. Simmer the coconut cream with the specified agar-agar and sugar, ensuring the agar dissolves completely. Pour the warm mixture over fully cooled jelly layers and refrigerate until firm for best results.
- → What are good natural color options for the jelly?
Use powdered or liquid natural colorings such as beet for red, carrot or paprika for orange, turmeric for yellow, pandan or spinach for green, butterfly pea for blue, and purple sweet potato for purple. Test small batches for shade strength.
- → How should leftovers be stored and how long do they keep?
Cover tightly and refrigerate. The layered jelly keeps well for up to 3 days; keep it chilled to preserve texture and prevent coconut cream separation. Avoid freezing, as thawing alters the gel consistency.