Pin It
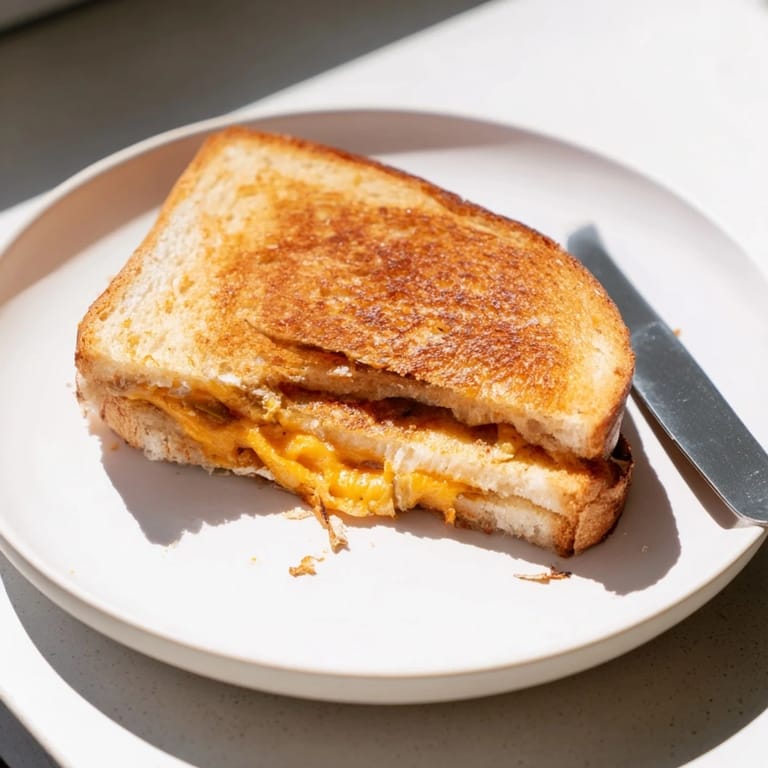
 The skillet was too hot, and I panicked as the butter started to brown faster than I expected. My first grilled cheese with jalapeños came out lopsided, one side nearly burnt, the other pale and sad. But when I bit into it, the sharp cheddar had melted into every crevice, and the pickled jalapeños cut through the richness with a vinegary kick that made me forget all about the uneven crust. I made another one immediately, this time with the heat turned down and a little more patience.
I started making these on weeknights when I was too tired to think but still wanted something that felt intentional. My brother came over once, skeptical about the jalapeños, and ended up eating three in a row. He kept saying it was the bread, but I knew it was the way the cheese got crispy at the edges where it touched the skillet. Now he texts me every few weeks asking if I have pickled jalapeños on hand.
Ingredients
- Thick-cut country bread or sourdough: The sturdiness matters here because thin bread will get soggy under the weight of all that cheese, and sourdough adds a slight tang that plays well with the jalapeños.
- Sharp cheddar cheese, grated: Grating your own cheese makes a noticeable difference in how it melts, and sharp cheddar has enough flavor to stand up to the heat of the peppers without disappearing.
- Pickled jalapeño slices, drained: The brine is flavorful, but too much moisture will make your sandwich steam instead of crisp, so give them a good drain and even a quick pat with a paper towel.
- Unsalted butter, softened: Softened butter spreads easily without tearing the bread, and using unsalted lets you control the seasoning, plus it browns more evenly than margarine ever will.
Tired of Takeout? 🥡
Get 10 meals you can make faster than delivery arrives. Seriously.
One email. No spam. Unsubscribe anytime.
Instructions
- Prep Your Bread:
- Lay out all four slices on a clean counter and spread the softened butter evenly across one side of each slice, making sure to get all the way to the edges. This is what gives you that golden, crispy exterior that crackles when you bite into it.
- Layer the Cheese:
- Flip two slices over so the buttered side is down, then pile the grated cheddar on top in an even layer. Don't be shy with it, the cheese is the main event here.
- Add the Jalapeños:
- Scatter the drained jalapeño slices over the cheese, distributing them so every bite gets a little heat. If you clump them all in one spot, someone's going to get a surprise.
- Close the Sandwiches:
- Place the remaining bread slices on top, buttered side facing out. Press down gently just to help everything stick together before it hits the pan.
- Heat Your Skillet:
- Set a large nonstick skillet or griddle over medium-low heat and let it warm up for a minute or two. Starting with a properly heated pan means even browning and no sticking.
- Cook Low and Slow:
- Place the sandwiches in the skillet and cook for 3 to 4 minutes on the first side, pressing gently with a spatula to help the cheese melt. Flip carefully and cook the other side until the bread is deeply golden and the cheese has fully melted into itself.
- Rest and Serve:
- Remove the sandwiches from the skillet and let them sit for a minute before slicing. This keeps the cheese from immediately running out all over your plate.
 Pin It
 One rainy Saturday, I made a batch of these for a friend who was going through a rough week, and we sat at my kitchen table with the sandwiches cut into triangles and a pot of tomato soup between us. She didn't say much, but she ate slowly, and when she was done, she looked up and said it was exactly what she needed. That's when I realized this sandwich wasn't just about the cheese or the heat, it was about the ritual of making something warm and simple when everything else felt complicated.
How to Get the Perfect Crisp
The secret to a truly crispy grilled cheese is patience and even heat. I used to crank the burner up to medium-high, thinking it would speed things along, but all that did was give me burnt edges and a cold center. Now I keep it at medium-low and let the butter melt slowly into the bread, which gives you time to let the cheese melt through without rushing. If you press down too hard with the spatula, you'll squeeze out all the melted cheese, so just a gentle press is enough to encourage contact with the pan. The bread should turn a deep, even gold, not spotted or blackened, and when you lift the sandwich, you should hear a faint crackle.
Variations Worth Trying
Once you've nailed the basic version, this sandwich becomes a canvas. I've added thin slices of tomato between the cheese layers, which brings a juicy sweetness that balances the heat, and a smear of cream cheese on the inside makes it richer and almost creamy enough to feel indulgent. Fresh jalapeño slices will give you more vegetal bite and less tang than the pickled kind, and a pinch of chili flakes mixed into the butter before you spread it adds a slow-building warmth. My favorite twist is tucking in a few leaves of fresh cilantro right before I close the sandwich, it sounds strange, but the herbal brightness cuts through the fat in a way that makes the whole thing feel lighter.
What to Serve It With
This sandwich plays well with anything acidic or crisp. A bowl of tomato soup is the obvious pairing, and the acidity of the tomatoes tempers the richness of the cheese in a way that feels almost necessary. I've also served it with a simple green salad dressed in lemon and olive oil, which adds a refreshing contrast and makes the meal feel more complete. If you're drinking something alongside, a crisp lager or a sparkling water with lime will cleanse your palate between bites, and iced tea works surprisingly well if you want something non-alcoholic.
- Keep a damp towel nearby to wipe down your cutting board after slicing the jalapeños, the oils can linger and surprise you later.
- If you're making more than two sandwiches, keep the finished ones warm in a low oven while you cook the rest so everyone eats at the same time.
- Leftover pickled jalapeños can be chopped and stirred into scrambled eggs, mixed into mac and cheese, or piled onto nachos.
 Pin It
 This sandwich has become my default answer when someone asks what's for lunch and I don't have a plan. It's quick enough to throw together without thinking, but it still feels like I made something real, and every time I make it, I'm reminded that the best meals don't always need a long ingredient list or complicated technique, sometimes they just need good cheese, a little heat, and enough butter to make the edges sing.
Recipe FAQs
- → Can I use a different type of cheese?
Absolutely. Monterey Jack, pepper jack, or a sharp white cheddar all work beautifully. For milder flavor, try a blend of cheddar and mozzarella.
- → How do I prevent the bread from burning?
Cook over medium-low heat rather than high. This allows the cheese to melt fully while the bread browns evenly. Pressing gently helps with even contact.
- → Can I make this ahead of time?
Assemble the sandwich up to 2 hours in advance and refrigerate. Cook it fresh when ready to serve for the best texture and melted cheese.
- → What bread works best?
Thick-cut country bread or sourdough are ideal for holding fillings without falling apart. Brioche or Texas toast also work well for a richer texture.
- → How can I make it spicier?
Add fresh jalapeño slices in addition to pickled ones, sprinkle chili flakes between layers, or swap in pepper jack cheese for extra heat.
- → What sides pair well with this?
Tomato soup is a classic pairing. Also try coleslaw, potato chips, a crisp green salad, or a cold lager for a satisfying meal.